Showing posts with label Recipes. Show all posts

Tuesday, February 17, 2015

Texas Sheet Cake -Revamped (Vegan; low Gluten; lower Sugar)


Yesterday for Dale's birthday, I converted a Betty Crocker Texas Sheet Cake recipe and I thought I'd share it with you. This is one of my all-time favorites cakes and although I still wouldn't call it "healthy", it was definitely a step in the right direction. This wouldn't be something I'd make regularly because of the sugar and gluten factors, but for a special occasion, it was pretty tasty. When you see the amounts of sugar, you'll understand what I mean and believe it or not, this Betty Crocker version was the lowest in sugar I could find. That does give the icing more of a glaze texture instead of the traditional fudge-like icing of most Texas Sheet Cakes. Hope you enjoy it. We did (and still are!)!


Texas Sheet Cake (vegan; lower gluten and lower sugar):
  • 2 cups spelt flour (I used 1 cup gluten free blend to lower gluten even more)
  • 1 cup Sucanat (*see note below)
  • 1 cup organic evaporated cane juice crystals
  • 1/4 tsp sea salt
  • 1 cup coconut oil
  • 1 cup water
  • 3 Tablespoons baking cocoa
  • 1/2 cup almond or coconut butter"milk" (**see note below)
  • 1 teaspoon baking soda
  • 1 teaspoon vanilla
  • 2 flaxseed "eggs"
Frosting
  • 1/2 cup coconut oil
  • 3 Tablespoons baking cocoa
  • 6 Tablespoons almond or coconut milk
  • 1 cup coconut sugar (***see note below)
  • 1 1/2 cup organic powdered sugar 
  • 1 teaspoon vanilla
  • 1 cup chopped pecans (optional)
For the cake: Preheat oven to 325 degrees. Grease a 15 x 10 x 1 pan and set aside. Stir flour, sugars and salt together in a mixing bowl and set aside. In a 2 quart saucepan, heat coconut oil, water and cocoa together just until boiling. Remove from heat. Pour oil/water/cocoa into mixing bowl with flour mixture and stir until well mixed. Add butter"milk", baking soda, vanilla and eggs to mixing bowl and stir until well blended. Pour into prepared pan. Bake 22-25 minutes or until toothpick inserted in the middle comes out clean.

For the frosting: While cake is baking, heat coconut oil, cocoa, almond or coconut milk, and coconut sugar in 2 quart saucepan just until simmering. Remove from heat. Beat in powdered sugar and vanilla. Whisk until smooth. Stir in pecans, if using. 

When cake has been removed from the oven, pour frosting over hot cake and allow to cool completely (about one hour) before cutting.

Notes: 
*You could probably strictly used Sucanat in place of traditional sugar, but it will significantly increase the fiber content so you made need to add more liquid to get a cake-like consistency to the batter.
**To make soured/butter milk, add 1/2 teaspoon apple cider vinegar in a measuring cup and then add almond or coconut milk to equal 1/2 cup. It will separate and curdle quickly. This is what you want it to do.
***Add the 1 cup of coconut sugar to what you heat in the pan, otherwise your frosting may be gritty. If you want to eliminate the powdered sugar altogether, then cook all coconut sugar in saucepan just until the sugar dissolves. Cooking too much can make it harder to spread onto cake.


Saturday, January 24, 2015

Two HEALTHY Super Bowl Snack Recipes


I've been on a quest to find some healthy alternatives for next week's big game. And even though "Deflate-gate" has had me angrier than I care to admit, I know my family will want snacks. It's sort of a tradition. Last year, Abbey handled most of the cooking and it was amazing, healthy, and even better because I didn't have to fix it! But this year, I'm on my own for finding healthy options.

I almost put in a request to Liana Shanti to ask her to develop a Super Bowl recipe book. Her Rawganic Vegan recipes are always tasty and usually fairly easy with very few "weird" ingredients. [weird = difficult to acquire in the Midwest U.S.A.] She must have read my mind, because although a booklet has yet to arrive in my inbox, she recently shared a delicious dessert hummus recipe that I made today and received a hearty thumbs up from three of the four who tried it.

The Double Fudge Chip Hummus (mine pictured above) has just enough sweetness, in addition to substantial protein from white beans and nut butter, to make this an awesome alternative to pancreas-overwhelming fruit dips you find in the store.

Orange Salsa - Photo by Judith Hausman (UrbanFarmOnline.com)


My favorite magazine, Urban Farm, also came through with the Hungry Locavore's Orange Salsa recipe. I made both of these today and let's just say lunch was pretty awesome!

If you have any tried and true football snacks that are healthy and delicious, please share in the comments below. While the boys in our clan will chow down on their favorite Buffalo Chicken Dip (yuck!), the girls and I will be highly anticipating our tasty whole food and vegan alternatives.

Thursday, November 20, 2014

Kale Crunchy "Croutons" (Vegan, Gluten-Free)


I love a good salad loaded up with lots of dressing, croutons and other tasty, crunchy goodies. That doesn't necessarily fit into a healthy, vegan, gluten-free lifestyle though. I refuse to pay over $6 a bag for gluten free croutons, so I've been on a quest to find a decent replacement. My daughter, Leah, recently began making roasted chickpeas which I admit were an adequate alternative.

But today, after juicing my breakfast, I found myself wistfully thinking that it would be great if I could find a use for all of the pulp remnants I've had lately. Sure, I can feed them to my worms, but they have had a plentiful supply since I've been mostly drinking juices for almost a week. I know you can also use pulp in place of eggs in fruit breads, but kale bread just doesn't sound very appetizing and I don't currently plan to start making gluten-free dessert breads.

Which brings me to my epiphany for the day: Instead of making kale chips (like everyone else does), why not make kale "croutons"!

Granted, they aren't square and you won't crack a tooth on them or break a tine trying to impale one on a fork, but they turned out pretty well and I thought I'd share with you how I did it.

Basically, after I juiced my kale, apples and carrots, this is what was left:


You can see in the bowl that I'd already begun to separate out the kale. Next time, I'll empty the kale pulp out of the juicer before I add any other fruits or veggies. I was using curly kale. I'm not certain that you'll get the same effect with a lucinato-type kale.

At this point, most-to all of the liquid has been removed, so I drizzled a little olive oil and sprinkled some garlic powder on them, laid them on my toaster oven pan, and began to roast them. I attempted to dehydrate them on the lowest toaster oven setting I have, which is about 150 degrees. I wanted to keep them RAW, but after 15 minutes, not much had happened to make the texture crunchy. I then roasted them at 200 degrees for 10 minutes and they were perfect. Since I had two different temperatures and times in total, here's my best recommendation and I will update this post when I make them again with more accurate information:

  • To keep them RAW, use a dehydrator or an oven/toaster oven on the lowest setting (about 150-170 degrees) and check every 15 minutes until you have the desired texture. Toss them every time you check them.
  • To get them crispier, roast at 200 degrees, evaluate every 5 minutes and toss them each time you check.
Now...I'm looking forward to my lunch salad today!


Note: I think you could use any seasoning/flavor combination that you'd like. I personally will be trying some nutritional yeast on the next batch to give them a cheesy taste.


Thursday, November 6, 2014

Lemon Spinach Quinoa Salad


This is another Kroger deli salad that we have enjoyed and for which we've created our own recipe (see also Super Food Salad). It's delicious and pretty easy. Plus, it's a good source of vegetarian protein. With 14 grams of protein in 3.5 oz of quinoa, this is one reply for all of those questioning doubters who ask vegans, "But how do you get enough protein?!"

The lemon vinaigrette dressing is a recipe I found on Epicurious. Otherwise, this recipe is just my best guess at how to replicate the Kroger version.

Dressing: 1/2 tsp. finely grated lemon zest
2 Tbsp. fresh squeezed lemon juice
1 tsp. sugar or honey
1/2 tsp. Dijon mustard
1/4 tsp. sea salt
3-4 Tbsp. olive oil

1 cup dry quinoa, cooked according to package directions
1 1/2 cups mango, cut into bite-sized pieces
1/2 cup finely chopped red onion
1/2 cup dried cranberries
1/4 c. wheat berries (soaked for 1 hour before placing in salad), optional
mixed greens, power greens or baby spinach- as many as you want to make a good sized salad

Mix all together. This is a salad that can be eaten warm or cold. If you want to leave out the wheat berries to avoid all gluten, you won't even notice a difference and could probably even substitute sunflower seeds.


Enjoy!

Sunday, September 28, 2014

Vegan Ice Cream by Jeff Rogers- A Book Review


There is no reason why those who avoid dairy should never enjoy the sweet and creamy deliciousness of ice cream. With that in mind, Jeff Rogers has created a wonderful book for vegans and those with dairy sensitivities. I will forewarn you that many of the recipes contain cashews. For those with nut allergies though, there are several options that are nut-free.

I tried out the Fresh Lemon recipe (page 53) and decided to soak the cashews prior to blending since I don't have a high-speed blender such as a VitaMix. For the first time, I created a beautiful, creamy vegan ice cream. Even though I didn't achieve perfection with the recipe, a quick rereading, showed me what I can improve the next time.

If, like me, you don't have a VitaMix-type blender, Rogers' suggestions on blending are priceless for avoiding the dreaded it-didn't-turn-out-so-I-have-to-throw-away-all-of-these-expensive-ingredients! Rogers' book offers several hints as to how to mimic the same smooth texture of dairy-laden ice cream. These are tricks that had eluded me, causing a lot of frustration in the past when I would make vegan ice cream. 

Rogers has several pages dedicated to "The Basics". These are the helpful hints that made churning optimal creaminess possible. I think this book would be a great tool for someone new to vegan recipes and also an old pro. I fall somewhere in between and felt like this read made me more confident and knowledgeable in regards to vegan staples and ingredients.

The photos are beautifully shot and definitely enticing. Until obtaining this book, I've never seen vegan ice cream like this...especially any made by me. I would contend that even store bought coconut, almond or rice milk brands don't compare. Besides, having control over all of the ingredients helps me avoid some of the nasty things that are still added to commercial "healthy" brands. And at sometimes over $5.00 a pint from my local grocery, an investment of roughly $10 for this book saves me at least that much by the time I've made my second quart of ice cream.

If you're a vegan, I don't think I could give this book any higher recommendation than Vegan Ice Cream: Over 90 Sinfully Delicious Dairy-Free Delights should be a staple on your recipe bookshelf.


Thursday, August 14, 2014

Salsa Verde


"Waste not, want not."

I am certain that phrase can originally be credited to a farmer. [Don't spoil my illusion by googling it.] I simply know that there are times when a gardener has enough tomatoes, hot peppers, onions and such to overwhelm the most savvy of all fresh-food connoisseurs. To be honest, there are also some days when the harvest is plentiful and the workers are few that the thought of blanching just one more vegetable and packing it into the freezer may actually cause mental duress.

I am grateful though. Absolutely grateful. 

The harvest has been abundant enough to share. Although it seems there is either not enough rain or far too much (as evidenced by the beautiful, non-edible mushrooms growing in my pots!)...

Embedded image permalink

and because of the extreme wetness and the cramped quarters on my patio, some of my plants haven't fared well. Spending two plus hours in the hot, sticky sun today pulling up old plants, amending soil for planting new ones and pruning the non-productive tomato, cucumber and lima bean vines was I felt, enough of an accomplishment for the day.

A quick walk through the kitchen verified that my work was not done.


What to you do with tomatoes that won't ripen or were knocked off the vine during your pruning endeavors? You make salsa verde of course!

I don't have an actual recipe. I am certain there are plenty available with a quick internet search. I just tossed in the same things I would to make my yummy fresh salsa:
  • tomatoes
  • hot pepper
  •  a little lime juice
  • one minced garlic clove
  • some chopped onion
  • a little sea salt
No measurements, just yummy goodness. 

But, this salsa must be cooked. So it all went into a pot, I put the lid on, turned it onto medium heat, and stirred it every few minutes. Once it cooked down and everything was softened, I turned off the heat, took off the lid and threw in some chopped cilantro. [Don't miss the cilantro!]

Taste it. Does it need more salt, garlic, lime juice or cilantro? No problem. Just add a little more.

The unpredictability of a garden explosion with one vegetable and an absolute dearth of another, warrants some creativity each year. Almost two decades ago, Dale bought a book for me that has been priceless for this very reason.

Marian K. Townes' A Midwest Gardener's Cookbook  provides multiple recipes listed first by season of harvest and then by specific midwestern grown vegetables. Have more eggplants than you could ever use or give away? Just look under summer and alphabetically you'll find several uses for your bountiful harvest. [I know you can now do the same thing on Pinterest. I still like my book though.]

Whatever the answer...eating as much as you can, sharing the wealth, giving it to a food bank, utilizing the ingredients of creative recipes, freezing, canning or dehydrating...it all makes for a very busy gardening season.

**Question to self: Did I really mean it when I said I wanted to garden year round?**


Friday, July 25, 2014

Fudgy Chocolate Zucchini Cookies- Veganized!


During my recent search for recipes utilizing the rather large pile of shredded zucchini I have on hand, I came across this recipe from An Oregon Cottage for Fudgy Dark Chocolate Zucchini Cookies. As yummy as they looked, you know I couldn't pass up an opportunity to veganize them!

Ingredients:

  1. Preheat oven to 350 degrees and line a cookie sheet with parchment paper.
  2. If coconut oil is not already softened, then heat briefly. If you needed to heat it , let it cool off a bit. Place oil in mixing bowl. Stir in sugars and carob or cocoa powder until combined. Add flax seed "egg" and vanilla.
  3. Mix in flour, baking soda and salt until smooth and then add the zucchini and chocolate chips. Stir until well combined.
  4. Drop by tablespoon sized scoops onto cookie sheet. Bake 8-10 minutes. Let cool about 5 minutes before sliding parchment over to cooling rack.

Notes of things I learned about this recipe:
*You can use up to 1/2 cup or carob or cocoa if you want a stronger chocolate flavor. 1/4 cup carob was enough for me as it has a distinct taste to it.
*We were out of vanilla, and didn't miss it.
*Like the original, you can use wheat flour instead of spelt if gluten isn't a concern.
*My batter was very thick. If you opt for whole wheat or whole spelt flour only, I would suggest making at least part of your sweeteners either honey, maple syrup or agave. You can google conversion ratios to granulated sugar.
*If your zucchini still has a lot of moisture in it, disregard the previous note.

These cookies are delicious. They even received my picky son's seal of approval!

Enjoy!


Tuesday, July 22, 2014

Lemon Zucchini Cookies (Vegan)


I love lemon. Since I also happen to have a large zucchini on hand, I decided to look at Pinterest for some tasty desserts. Not only is there a plethora of zucchini available this time of year, the zucchini recipes also abound.

Enter my vegan version of lemon zucchini cookies. You can find the original recipe here. I made very few changes. The most complicated part of the recipe is to get the ratio of flours correct, if you are not concerned about gluten, this recipe will be very easy.

Ingredients:
1/2 cup coconut oil
1 cup sugar (any combination of natural sweeteners)
1 flaxseed egg
1 cup finely shredded zucchini
1 teaspoon grated lemon peel
2 cups flour (I used spelt, whole spelt and gluten-free mix, combined)
1 teaspoon baking soda
1 teaspoon baking powder
1 teaspoon ground cinnamon
1/2 teaspoon salt
1/2 cup chopped walnuts

*And because I love lemon, I added a splash of lemon juice.

Step one: in a large bowl, cream coconut oil and sugar until light and fluffy. Beat in flaxseed egg, zucchini and lemon peel. Combine the flour, baking soda, baking powder, cinnamon and salt; gradually add to the creamed mixture and mix well. Stir in raisins and walnuts if desired.

Step two: drop by tablespoonfuls 3 inches apart onto parchment-lined baking sheet and bake at 375° for 8 to 10 minutes or until lightly browned. Remove to wire racks to cool. I simply slide off the parchment paper onto the cooling.

Step three: you can easily make a glaze for these as well. I chose instead to sprinkle them with rapadura sugar in order to reduce the amount of sugar from the original recipe.

Enjoy!

Saturday, July 12, 2014

Mojito Ice Cream (DF, GF, VG, non-alcoholic)

Why, yes. It IS just as wonderful as it looks!


In honor of yesterday's National Mojito Day and the fact that my garden and my friend's both have a plethora of mint right now...I decided to experiment a little. Here is the result.


Ingredients:
2 cans full fat coconut milk or cream 
[I prefer Trader Joe's coconut cream, but these are what I had on hand]
4-6 Tablespoons, raw honey
2-3 Tablespoons, lime juice
Dash of Pink Himalayan salt
1 heaping Tablespoon fresh mint, chopped or torn very small


  • Pour the coconut milk into a bowl and add honey, juice, and salt
  • Mix with a whisk until well-blended
  • Sprinkle in the mint and stir until combined
  • You can do a little taste test at this point to see if any additional honey, juice or mint may be needed
  • Pour into ice cream maker and follow manufacturers directions
  • For my ice cream maker, I froze the contents in the ice cream maker tin for one hour and then processed in the electric maker as directed.
Good thing National Mojito day coincides with mint season...and salsa season...and Mexican food season...and just about any season I think I could eat this delicious ice cream!

************************************

Note:  Upon further reflection, if having pieces of mint leaf in your ice cream is unpleasant to you, you could gently heat the lime juice in a small pan on very low heat with the mint pieces. I think if you stirred it for 4-5 minutes and then strained the liquid, it would take on enough mint flavor to do the trick. The step of placing the ice cream maker tin in the freezer for one hour would be all the more important if you use this tip. The pieces of mint are negligible and could be cut so small as to be unnoticeable if this additional step isn't appealing.


Thursday, March 13, 2014

Basil Quinoa with Red Bell Pepper Recipe


I found this recipe through Pinterest last night because Meijer had a great deal on red bell peppers and I had six of them to use up. One more reason I love the internet (especially Pinterest). You simply search by ingredient and "voila!" instant recipe.

Now...here's the thing though...most of these I want to "vegan-ize". So I do have some parameters with which I am working when I hunt out the next great dish to prepare. I also only took one photo because just the night before I prepared a vegan version of this Irish Apple Cake recipe that looked amazing...but didn't quite taste like it. I painstakingly took photos throughout the process and then it was a little disappointing to say the least. I'll probably attempt it again another time.

But back to the quinoa.

Ingredients:
2/3 cup quinoa
1 1/3 cup 
1/4 teaspoon salt

*Rinse quinoa well and drain. Combine quinoa, water and salt in a medium saucepan. Bring to a boil. Reduce heat. Cover and simmer for 15 minutes. Allow to cool slightly.

More Ingredients:
1 cup fresh basil, washed
2 Tablespoons olive oil
2 Tablespoons nutritional yeast
2 Tablespoons raw cashews
3 cloves garlic

*While the quinoa is cooking, prepare your "pesto" sauce by placing all ingredients in a small food processor. Process until smooth. 
Note: This will probably be smoother if you soak your cashews for at least an hour prior, but it is not necessary. Also, 3 large cloves was a lot of garlic. You can reduce or increase this to taste.

 Even more ingredients:
1 cup chopped red bell pepper
1/2 cup chopped green onion
1/4 cup raw sunflower seeds

*Prepare these three items and then combine the quinoa and basil sauce gently. Next, toss in the pepper, onion and sunflower seeds.

If you like pesto, you'll love this. To give it even more "cheese" flavor, you could increase the nutritional yeast by an additional tablespoon.

Enjoy!

Saturday, March 8, 2014

Mexican Rice


This recipe is gluten free, dairy free and vegan. It's almost too good to be true!


Ingredients:
1 can (14.5 oz) undrained diced tomatoes
2-3 cups water or vegetable broth
1 Tablespoon olive oil
1 bell pepper, chopped
1 large onion, chopped
2 cloves garlic, minced
1-1/2 cups short grain brown rice
1/8 teaspoon cayenne pepper
1-2 teaspoon cumin
1 can black beans, rinsed and drained
1 can yellow corn, drained
sea salt, to taste
cilantro (optional)

Instructions:
1. If you're using dry black beans, instead of canned, cook according to directions on the package. I add a 3.5-inch piece of kombu* to shorten the cooking time.


2. Drain tomatoes, reserving liquid. Add enough water or broth to make 3 cups; set aside.
3. Heat oil in 4-quart heavy saucepan with tight-fitting lid.


4. Add bell pepper, onion and garlic; saute' briefly.
5. Add rice, cayenne and cumin (to taste); stir.
6. Add the 3 cups reserved liquid.


7. Bring to a boil. Reduce heat to low, cover and simmer 30 minutes
8. Add tomatoes.


9. Cover and continue cooking 20 minutes.
10. Remove from heat; add drained beans and corn. Mix gently a little.


11. Let stand in covered pot for 10 minutes.
12. Fluff with fork. Add sea salt and cilantro to taste.

Note about ingredients:
*Kombu is edible kelp. A 3.5-inch piece has 2% of your Calcium RDA and 6% of your Magnesium RDA. It also has trace amounts of protein, Vitamin A, beta-carotene, Vitamins B1, B2, B3, B5, and B9, Vitamins C, E and K. As a sea vegetable, it also contains iodine, glutamic acid, iron, manganese, phosphorus, potassium, sodium and zinc. Adding a 3.5-inch strip to your dried beans for cooking helps to "predigest" the beans. This natural tenderizing renders the bean easier to digest and less likely to cause bloating and/or gas. According to this article, kombu can reduce blood cholesterol and hypertension too. Once the beans have completed cooking, you can simply remove the kombu and throw it in your compost pile. If it has completely dissolved into the beans, your family will never even notice and you will most likely have to add less sea salt to the final dish. If you're uncertain if you'd like the kombu to end up in the recipe, simple drain and rinse your beans and it will be your little secret as to how your beans turned out so well.


Saturday, February 15, 2014

Peanut Butter Chocolate Scones (Vegan/Low Gluten)


We had several more inches of snow last night and I wanted something warm and filling for breakfast. I thought I'd tinker with my scone recipe to create something new. This is the result.

Peanut Butter Chocolate Scones

1 1/2 cup organic spelt flour*
2 Tablespoons organic Sucanat
2 1/4 teaspoon aluminum free baking powder
1/4 teaspoon baking soda
1/2 teaspoon sea salt
1/3 cup natural creamy peanut butter**
1 flax seed "egg"
6 Tablespoons coconut milk, divided (almond or rice can be substituted)
1 teaspoon vanilla extract
demerara sugar, for sprinkling
2 squares semi-sweet chocolate baking squares***

Preheat oven to 425 degrees Fahrenheit. Line a baking sheet with parchment paper.

Flax egg after it has set up.

Start your flax egg by combining 1 Tablespoon flax meal and three teaspoons water. Allow to set up while you begin stirring the dough.


In a mixing bowl, gently mix together flour, sugar, baking powder, baking soda and salt. Set aside. In a separate small bowl, combine peanut butter, "egg", 2 Tablespoons coconut milk, vanilla.

This "wet" mixture became fairly solid even though my peanut butter was a natural, runny version. Place the "wet" ingredients into the dry and stir. You can even use a pastry cutter because it will take on a crumbly appearance as you combine.


Now, add the rest of your milk, 1 Tablespoon at a time until your dough starts to form into a ball and hold together. I stopped with a total of 6. This included the initial 2. When you've added enough milk that it starts to stick together, begin kneading the dough gently in the bowl. You may need more or less milk, depending upon your flour and the type of peanut butter you used. If the dough is starting to stick to your hands as you knead it, it is wet enough. 

The key to spelt is do not overwork the dough.

Divide the ball into fourths and pat into a thick square and place on the parchment lined baking sheet. Sprinkle with a little demerara sugar. Bake for about 12 minutes in the preheated oven.

While the scones are baking, melt your chocolate either in a double broiler, microwave or in the warmed oven.

When the scones are done, they will be not "give" when pressed in the center. Remove from the oven and drizzle the chocolate on top. Enjoy!


Notes: *Spelt is a  low gluten alternative to traditional wheat. I am wheat sensitive and yet spelt does not cause any recognizable inflammation for me.
**You could probably use crunchy peanut butter, but you may need to add additional milk.
***You could successfully add chocolate chips instead, I believe. I'd try mini-chips and limit it to about 1/4-1/3 cups total, at least until you've experimented with them the first time.


Tuesday, January 28, 2014

Crumb Cake- Vegan Version


Originally I found this recipe in Grandma's Kitchen cookbook by Gooseberry Patch. I "vegan-ized" it about three years ago. I haven't made it in a long time. But on a morning when the real-feel temperature is in the minus double digits, my kids and I loved the warm, yummy goodness right out of the oven.


Cake:  2 Tablespoons oil
1 flax meal "egg"
1/2 cup milk of choice (almond, coconut, or rice)
2 teaspoons vanilla extract
1/2 cup Sucanat
1 1/2 cup Organic White spelt flour*
2 1/2 teaspoons Aluminum-free baking powder
1/2 teaspoon sea salt


Topping**:  1 1/4 cup Organic White spelt flour*
1/2 cup Sucanat
1 1/4 teaspoon organic cinnamon
Scant 1/2 cup coconut oil, melted and cooled


1. The most "difficult" part of this conversion is the flax meal egg. If you've never made one, don't worry. Just add 1 Tablespoon flax meal to a cup and an additional 3 Tablespoons water with it and stir. Let it set for a moment while you gather the rest of your ingredients and it will be good to go!

2. Preheat your oven to 325 degrees. Put coconut oil from the topping in a medium bowl and  place the bowl in the oven to melt while you begin your cake mix.

3. Combine all of the cake ingredients in the order given above in a medium bowl. Sucanat has a coarse texture. If you add it to the liquids, stir and let it sit while you measure out your flour, you will avoid any crunchy tidbits in your cake. [Remove coconut oil from oven, if you haven't done so already.]

4. Once combined together, add to an ungreased 8 X 12 inch pan, spreading to the edges of with a spatula.
(As you can see from the photos, I only had a deep-dish pie pan available. It's a pretty flexible mix.) Don't over mix spelt. It is a gentle grain and if you over stir, can become chewy.


5. With the coconut oil, combine the rest of the topping ingredients. It will be crumbly. Even if it is fairly wet, it will still taste great. Just cut down on the amount of coconut oil the next time.

6. Sprinkle crumb topping over the cake batter and place in oven.


7. Bake for 30 minutes. Since spelt is a wetter grain than traditional bleached white wheat, you may have to bake a little longer or up your temperature 5 or 10 degrees to get the middle set. That's what you want, a set middle. You can stick a knife in the center to test doneness of the cake, but bear in mind that some of the topping will most likely stick to the knife and does not mean the cake isn't done.

8. Remove from oven, cool (if you can wait that long) and enjoy. If you want a little extra sweetness or panache...dust it with powdered sugar before cutting.


Notes:  *I sometimes substitute up to 1/3 of the white spelt with whole spelt for additional health benefits. I have even used 1/3 gluten free flour, 1/3 whole spelt and 1/3 white spelt for the cake batter, but you will need an additional flax egg and possibly a little less liquid. After making the traditional cake a few times, you'll have a good idea what the batter should look like.

**The original recipe called for DOUBLE the amount of topping I have indicated above. But for us, that was just too much sugary topping.

Gluten-free note: Spelt is NOT gluten-free, but is low gluten and can be tolerated by many who are gluten-sensitive.

Sunday, January 26, 2014

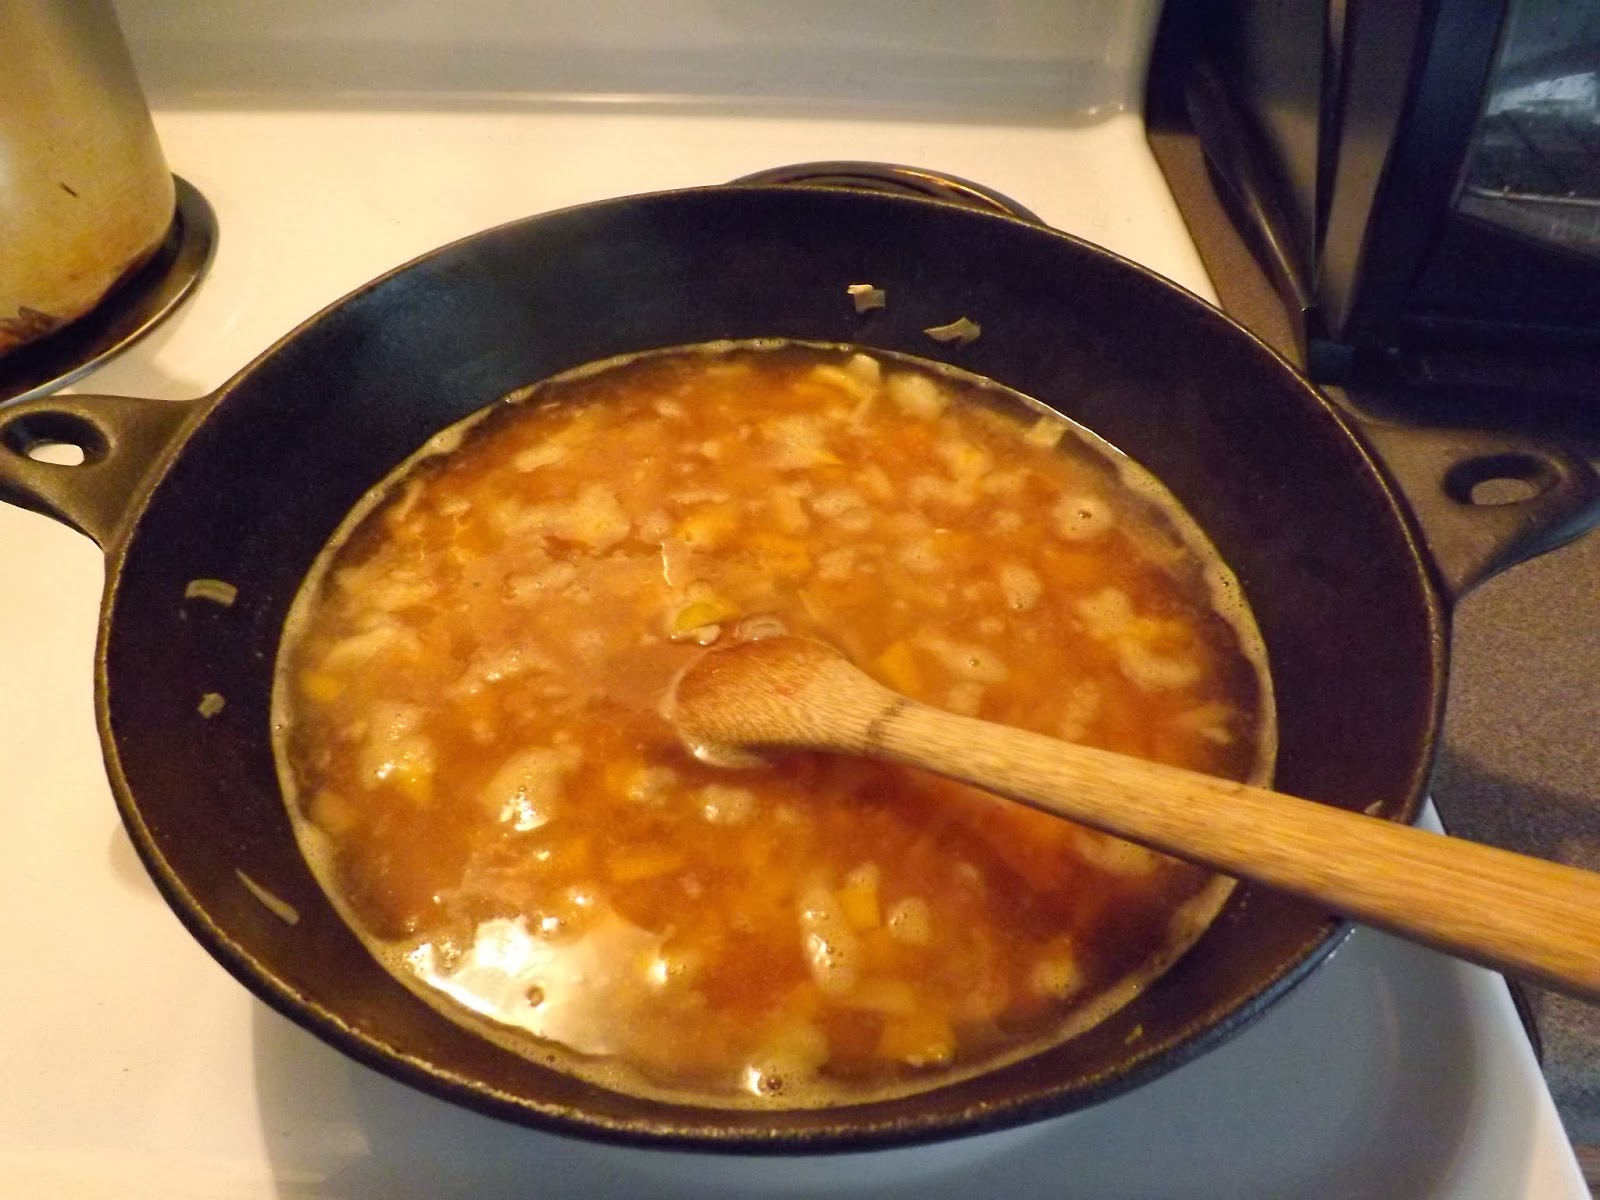
Cuban Black Bean Soup

Cuban Black Bean Soup pictured with Pamela's Old Fashioned Skillet Cornbread

Given the way cold winter we've had, I have been breaking out some of our tried and true soup recipes. I found this one a few years ago on a Bob's Red Mill black bean package. I modified it to make it vegan and we've loved it ever since.

1 pound dry black beans
4 cups water
*Soak beans overnight or heat in the 4 cups water, cover and boil 2 minutes. Turn off heat and let stand for one hour. I have also successfully cooked them all day on high in a small crock pot *optional use of 2 cans black beans cuts cooking time to less than half. if you use canned beans, do not use this 4 cups of water.

1 3.5-inch piece of kombu (size is approximate!)**
3 cloves garlic, pressed
 1 bell pepper, med., chopped (2 jalapenos will add a spicy alternative!)
1 onion, medium, chopped
2 teaspoons paprika
3 teaspoons cumin
2 bay leaves (or 1 teaspoon crushed bay leaves)
4 cups vegetable stock (or the equivalent with veggie bouillon)
1/4 teaspoon chili powder (can substitute cayenne for more kick)
1 Tablespoon red wine vinegar
sea salt and black pepper to taste


Add all ingredients to beans except salt, pepper and wine vinegar. Cover and simmer for two hours if using soaked dry beans or about 30 minutes for canned beans. Add salt, pepper and vinegar. Bring to a simmer, heat through and let stand. If you used whole bay leaves, remove them before serving.

This soup can also be served over cooked brown or white rice.

**Kombu is a wide leaf, deep growing sea vegetable that is used in soup or soup stock. When you add it to dried beans, it helps to tenderized them and cut cooking time considerably. it also contains natural sodium, thus cutting the amount of sea salt needed for flavor. One 3.5-inch piece has 170 mg potassium and over 100% the RDA of iodine, 6% RDA of magnesium and 2% RDA of calcium, making it an excellent addition to a vegan diet!


Wednesday, January 15, 2014

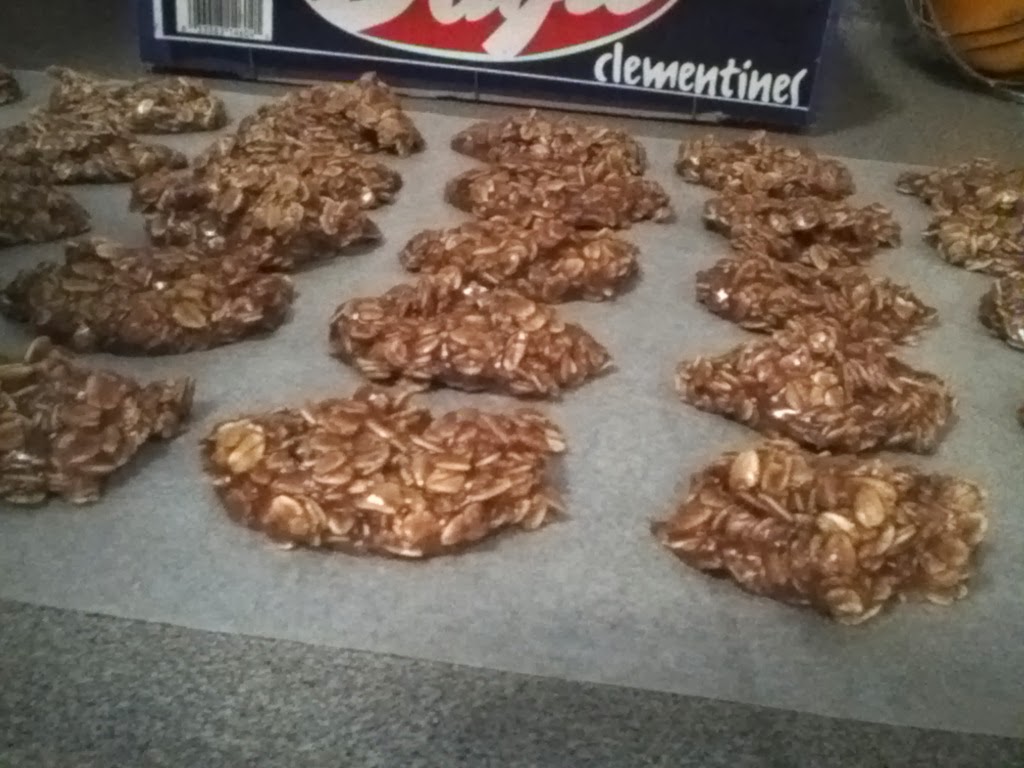
No Bake Cookies, Vegan Style


My friend, Heather, asked me for this recipe recently and I realized that although I would be a very rich woman if I had a dollar for every time I've made these, I have no recipe down on paper. So...here it is.

The original, my older siblings brought home in a Mulligan Stew comic book when I was in early elementary school. By the time I was in high school, I had it memorized. Here is the original contents:
1/2 cup butter (1 stick)
1/2 cup milk
2 cups sugar
2 Tablespoons peanut butter
1 teaspoon vanilla
2 Tablespoons cocoa
3 cups quick cooking oats

To be honest, I foresee no way to make this recipe "healthy". Instead, I can offer the following as a healthy-ish option.

1/2 scant cup coconut oil
1/2 cup coconut or almond milk
2 cups evaporated cane juice or rapadura sugar (these are usually Vegan)
2 Tablespoons nut butter of choice
1 teaspoon vanilla (preferably Fair Trade)
2 Tablespoons cocoa (preferably Fair Trade)
3 cups rolled oats (not quick cooking)

  1. Place oil, milk, sugar and nut butter in 2 quart saucepan.
  2. On medium high heat, stir occasionally and bring mixture to a boil.
  3. IMPORTANT- set timer for one minute and allow mixture to boil while stirring only enough to prevent it boiling over.
  4. When timer goes off, immediately remove the pan from heat.
  5. Stir in cocoa, vanilla and oats until blended.
  6. Lay out enough waxed paper for cookies (about 15-18 inches) on a countertop.
  7. Drop cookies by desired sized spoonful.
  8. Allow to cool.
  9. Enjoy!


If you've prepared them properly, the first ones dropped onto the waxed paper should be setting up by the time you put the last ones in place. 

I have successfully learned how to cut this recipe in half also, but I wouldn't suggest attempting it until you're familiar with the consistency,as the timing does need adjusted lower, but not completely in half.


Monday, December 23, 2013

Better Than Panera, Orange Cranberry Scones


The last time, about a year and a half ago now, that my daughter paid around $2.50 for a yummy orange scone at Panera, I confidently said, 'I bet I can make those at home for a lot less.' I knew it was not only possible, but very likely they would be healthier too. Since my first batch, I've quietly thought to myself that they are tastier also. Last week, when a friend told me, "They're better than Panera," and promptly asked for the recipe...I thought there may just be others out there who are tired of forking over too much hard-earned cash for a sometimes rock-hard scone.

 
A few years ago, I found this great recipe on Opera Singer in the Kitchen's website. Full credit goes to her for the original. I have modified it even further though so I'm not going to copy her version here.
 
Ingredient list:
  • 1 1/2 cups spelt flour (You can use a combination of whole and white, more white than whole though. )
  • 2 Tablespoons Sucanat
  • 1 Tablespoon organic orange zest
  • 2 1/4 teaspoons baking powder
  • 1/4 teaspoon baking soda
  • 1/2 teaspoon (or less) sea salt
  • 6 Tablespoons coconut oil
  • 1 cup organic cranberries, chopped
  • 1 flax or chia "egg" {1 tablespoon flax meal or chia seed + 2 Tablespoons water}
  • Approximately 1/4 cup fresh squeezed orange juice and/or coconut milk (Look for details about this at the end)

 
Preheat over to 425° F. Stir flour, Sucanat, orange zest, baking powder, baking soda and sea salt together in a large bowl.

 
Cut in coconut oil with a pastry cutter until it looks almost like a crumb topping.

 
Now is the best time to toss in your fruit of choice so it doesn't all stick together once the wet ingredients are added.

 
Stir in the egg and juice/milk combination (I'll explain this further at the end). Mix together with a fork or wooden spoon until the dough starts to form a ball.

 
*Here's the secret to making them like Panera! Do not roll them out like a cookie or pizza dough, which is very common. Instead divide into fourths and pat into a square-ish shape. They will be rather thick. I use parchment paper to make clean up easier and also, because depending upon your pan, if you don't, you'll have to lightly grease the cookie sheet. If you want a fairly healthy version of this scone, then right here, sprinkle them with either Rapadura or Sucanat sugar because they are chunkier and look pretty.

 
Bake 10-14 minutes depending upon desired level of  "doneness".  If you're opting for the most Panera-like scone you can get, while they are baking, mix together the following for a glaze:
 
  • I Tablespoon coconut oil, melted
  • about 1-2 Tablespoons orange juice
  • about 1/3-1/2 powdered sugar
As soon as the scones come out of the over, drizzle a lot of glaze on top. You also have the option of letting them cool a little, making a thicker glaze and spreading it on top to resemble the Panera scones. The recipe for the glaze is mostly approximations, dependent upon how thick you want it.
 
And that's it...almost!
 
Here are my fool-proof  "must do's" if you are looking to have the "better than" label attached to your healthier scones.
  • If you're using spelt, which is a wetter dough than all-purpose, bleached, yuck...you must at some point, mix it by hand. This is the only way to make sure your dough is not too wet, which leads to the second "must do".
  • The juice/milk combination is strictly a matter of preference, more juice means more orange flavor. But, if using spelt, you will most likely not need the entire liquid unless you are hoping to do a completely whole wheat or whole spelt scone. Then, you also need to opt out of Sucanat in favor of honey, maple syrup or agave instead.
  • Yes, I have made the dough far too wet in the past, and they still bake up very tasty and nice. Handling them, not having a whole scones-worth of dough stuck to your hands and shaping them well goes much better with a dough that is mixed just until it sticks together. Try adding about half of the necessary liquid and increasing it as needed.
  • The original recipe makes eight scones. In order to get the Panera size, you'll only get half of this amount from my version. I easily double it though (as I did in the photos above) and still get eight. Just remember when you're eating them...1 of my scones = 2 of the originals!
  • This recipe is very versatile and is the only one I use for scones. It is super easy to swap out flavor and fruit options to experiment with different tastes. I've made pumpkin (just watch the amount of liquid very carefully); lemon/poppy seed; gingerbread; blueberry/lemon; apple/cinnamon;is cranberry, the original dark chocolate/orange or like Panera, just orange. I used fresh cranberries for the recipe because they are widely available right now and are just so much better than the dried version. Dried is entirely usable though. Really, the possibilities are pretty much endless.
  • Last thing, I can't stress enough the part about shaping them by hand. I read a few years ago, that as a low gluten flour and because it is wetter than regular wheat, spelt should not be handled much. Keep in mind that by stirring less, combining just until it holds together and shaping, instead of rolling them out...you will be rewarded with tender, flaky...very delicious scones.
Oh yeah...one more thing: Eat them while they're warm! They really taste best that way.